Quick Start
Initialize first, then run the app and Frontguard in separate terminals. This five-step walkthrough sets up deterministic visual regression testing in any web project.
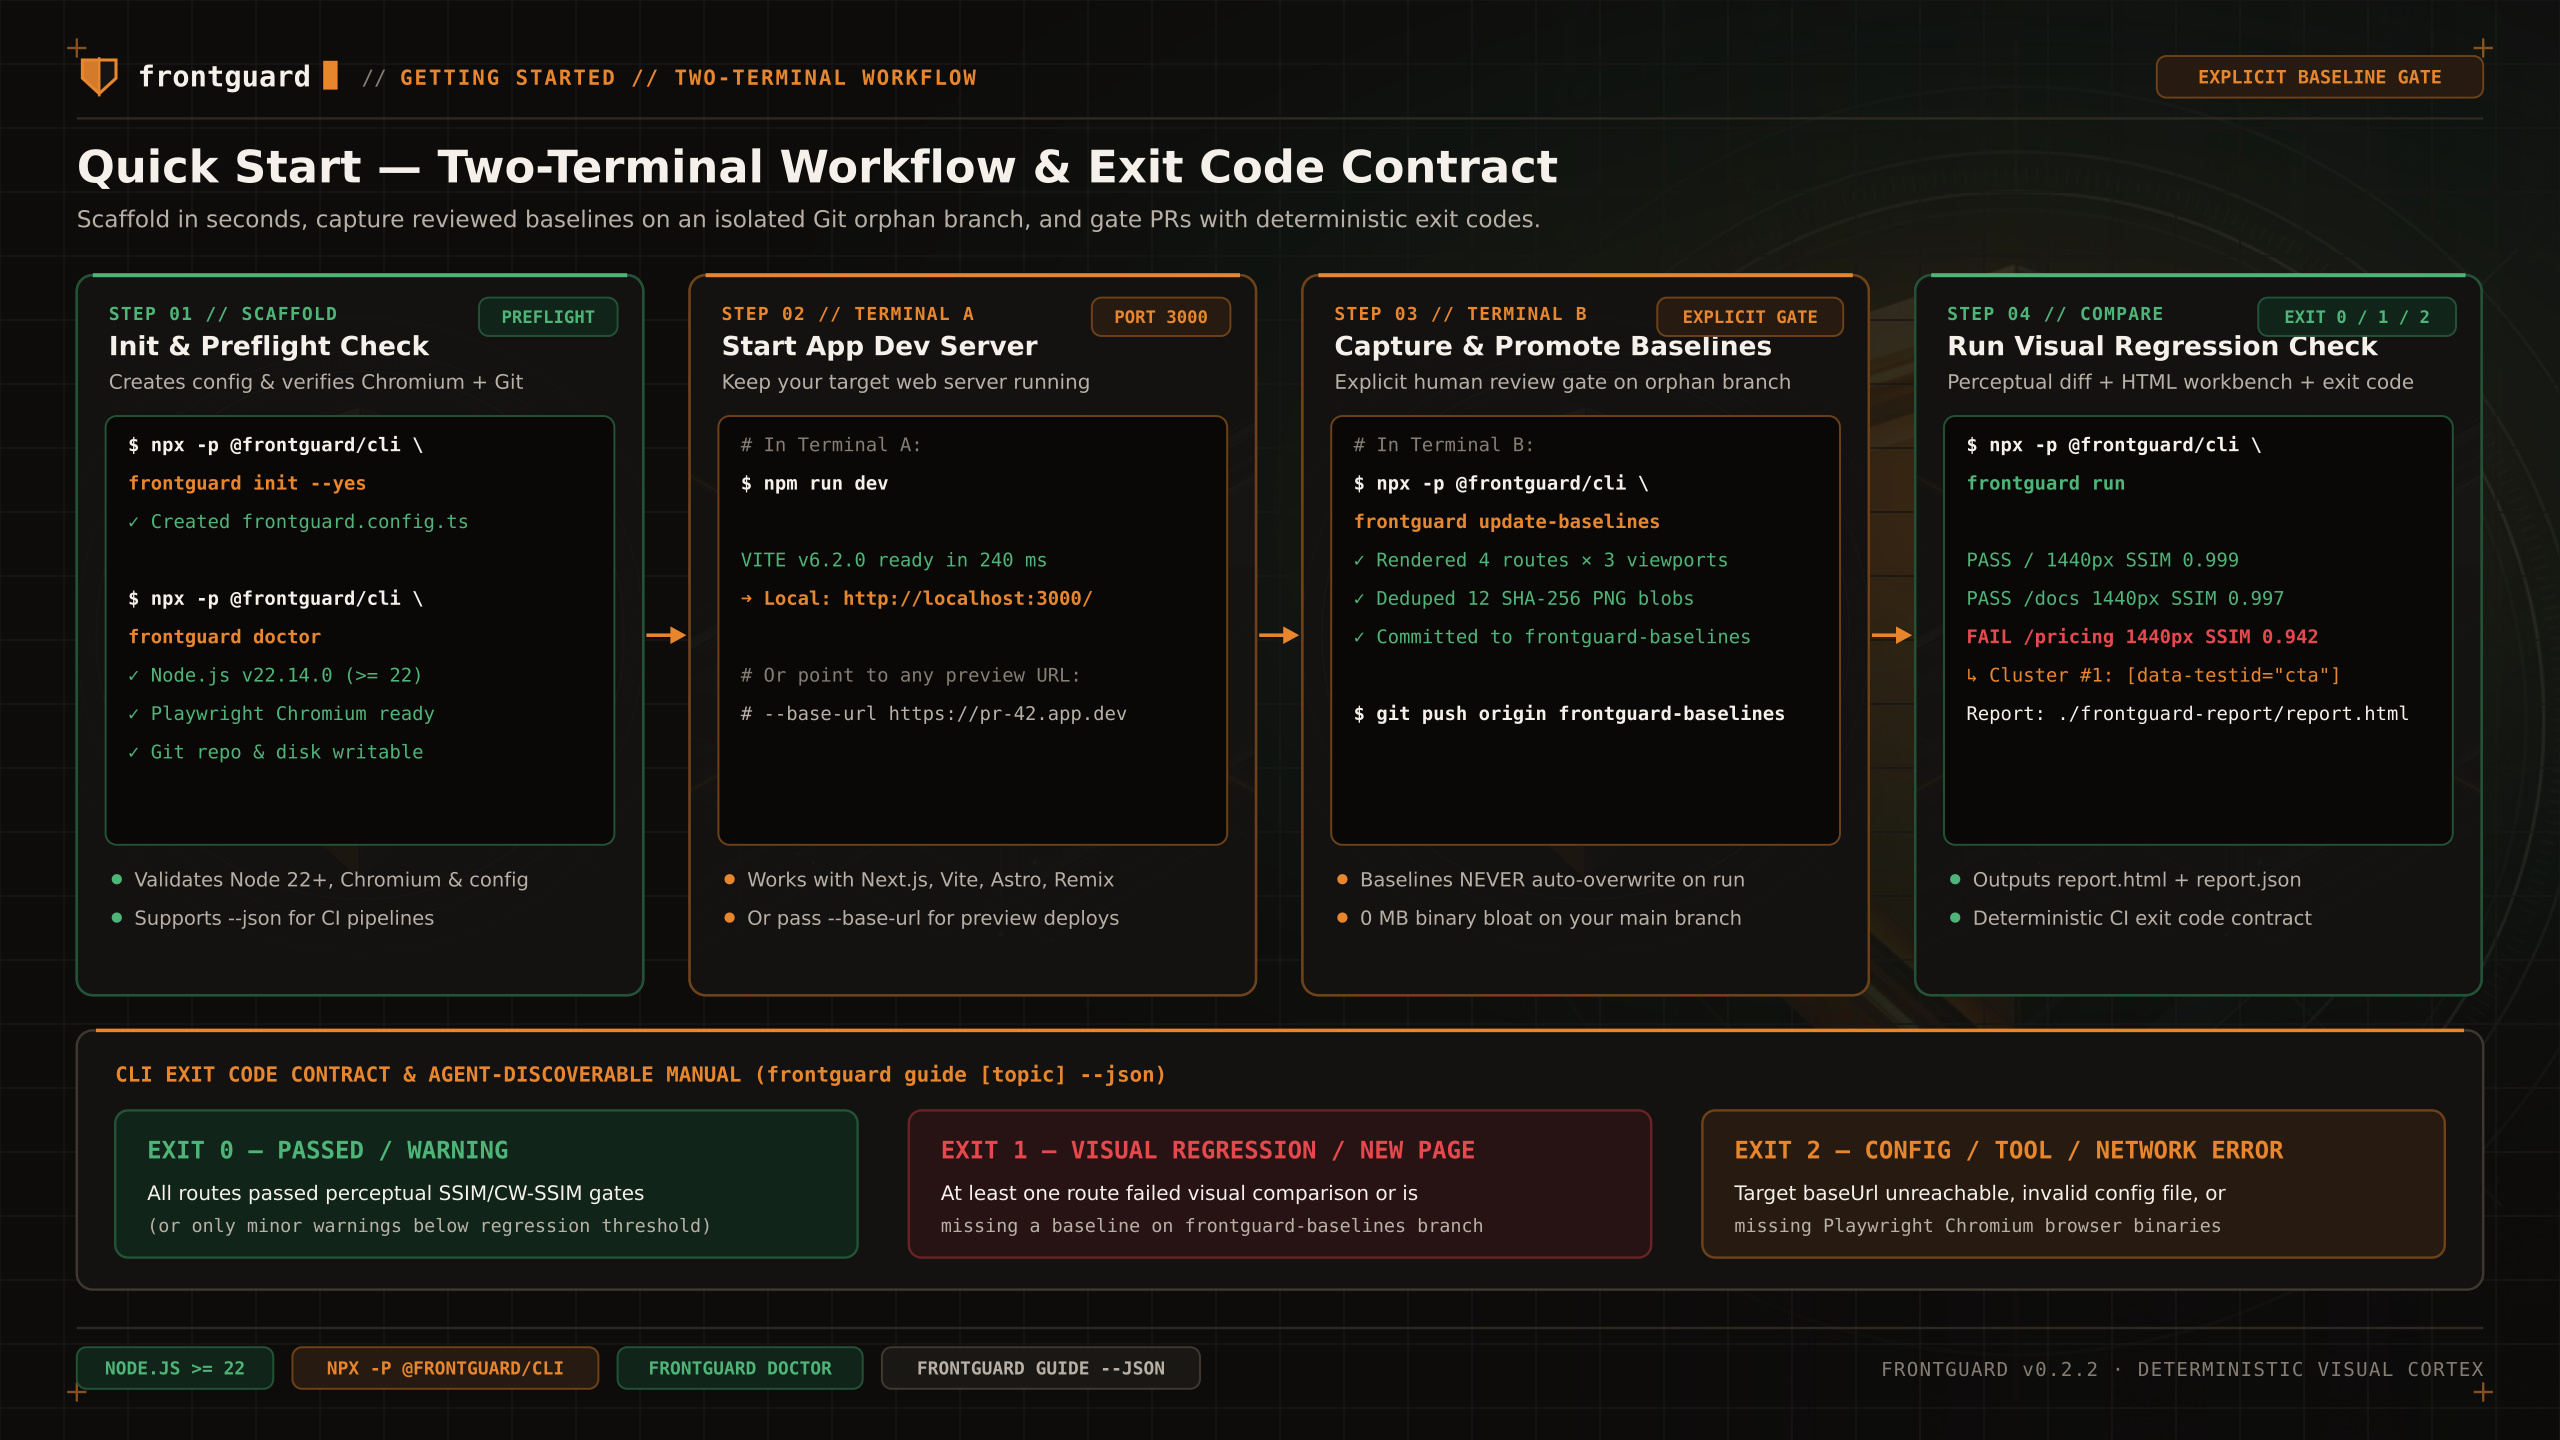
Initialize
Accept baselines
In the app terminal, use your project's dev-server command and leave it running. The command below is one example; wait for the generated config baseUrl to respond.
In the Frontguard terminal, use the generated config rather than overriding its URL. Run doctor, capture initial baselines with update-baselines, and push the orphan branch if CI will compare against it:
Compare
Exit code 0 means comparisons passed or warned, 1 means regressions or unaccepted new screenshots, and 2 means no comparisons or a tool error.
To test how Frontguard catches a real regression, change a button color or heading margin in your app while npm run dev is running, then re-run frontguard run:
Inspect the HTML workbench
Open ./frontguard-report/report.html in a browser. To serve it over HTTP, run python3 -m http.server 8080 --directory ./frontguard-report and visit http://localhost:8080/report.html. Keep the images/ directory alongside report.html when moving or sharing the report; the HTML normally links to those PNG files.
| Shortcut | Action | Practical Use |
|---|---|---|
1 / 2 / 3 / 4 | Switch comparison view mode | Toggle Side-by-Side (1), Interactive Swipe Curtain (2), Onion Skin Opacity (3), or Diff Focus (4). |
b | Toggle spatial cluster bounding boxes | Highlights 8-connected diff clusters and displays their grounded DOM selector (targetSelector). |
j / k | Next / Previous route | Step rapidly through failed and warned routes without touching the mouse. |
/ | Focus route search & status filter | Filter by route path (/pricing), viewport (375px), or status (Regressions, Warnings, Passed). |